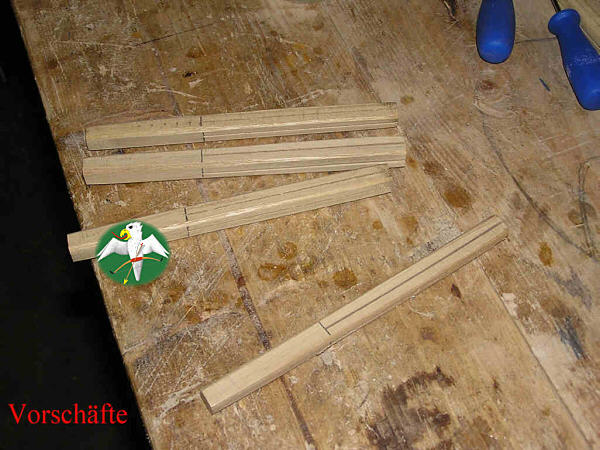
The footing is a small but shaft-wise oversized billet with a cross cut the lenght of the final splice. I do this with a bandsaw, but any hand saw should work just fine.
|
Cody, splicing and footing an arrow is covered and nicely explained in TBB Vol.-III by Gene Langston, I think you should get yourself a copy!? Anyhow, I did a tutorial for a four pronged splice some years ago and looked through my stuff and indeed came up with the pics. There are explainations in German, but you'll get the idea ndash; plus I'll give you some sort of translation here and there. |
|
The footing is a small but shaft-wise oversized billet with a cross cut the lenght of the final splice. I do this with a bandsaw, but any hand saw should work just fine. |

Far more tricky is the pattern which the shaft needs to be. I cut them by hand with a handforged tool whose English name escapes my mind. Imagin some chisle like thing with a 90° V-shaped cutting edge in front. The fading cut starts shallow at the trailing end of the splice, reaching forward at constant angle, going deeper to almost half the shafts diameter at the front. I made a jig from steel tubing which fits 11/32" shafts. There is a splice-long triangular piece removed in the tubing and I can run my cutting tool down the jig without going to deep into the wood. Nevertheless a nusiance to do and the most difficult part of the whole affair. |
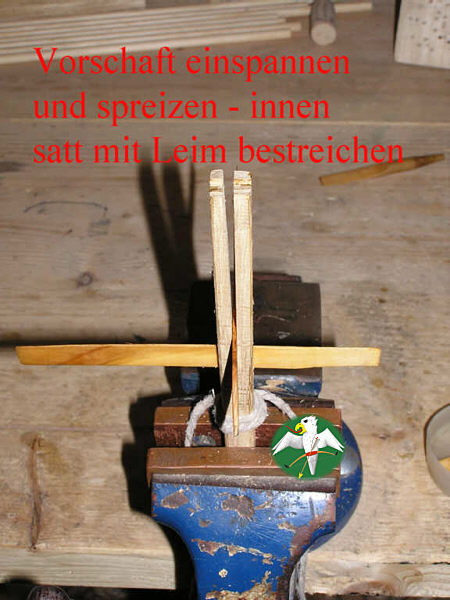
Clamp foreshaft into wise and spread the cuts to apply glue. I use 24h epoxy here. |
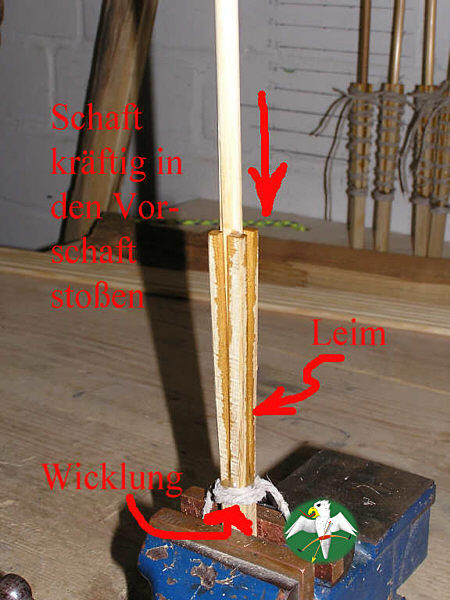
Force the glue covered shaft into the foreshaft. You need to bind the lower part with strong twine before you do, to prevent it from splitting. |
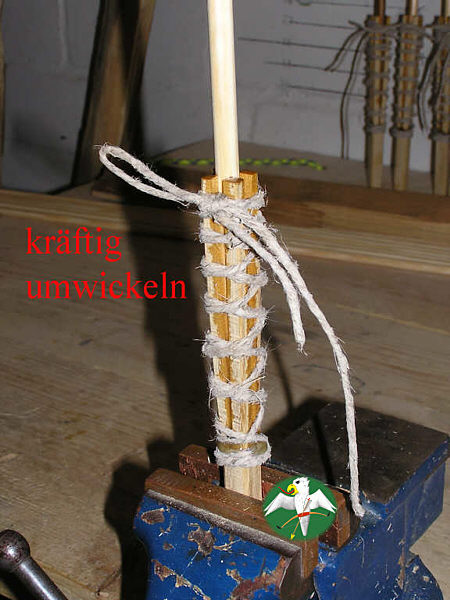
Wrapp the twine around the foreshaft and pull really thight as you go. |
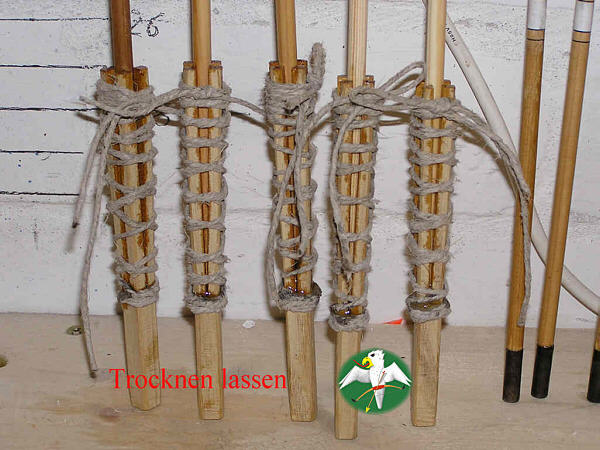
Set aside and let the whole stuff cure. |
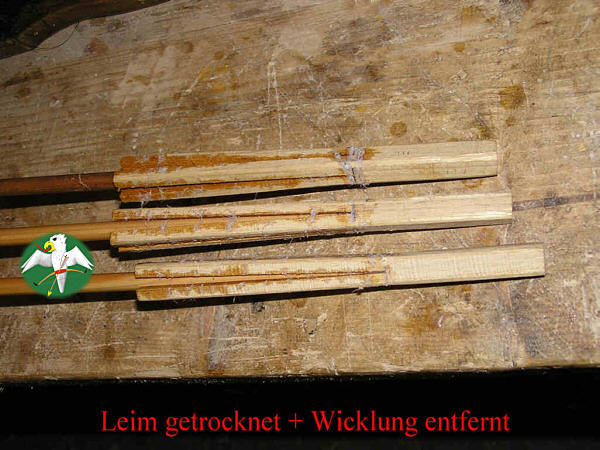
Cut twine away. |
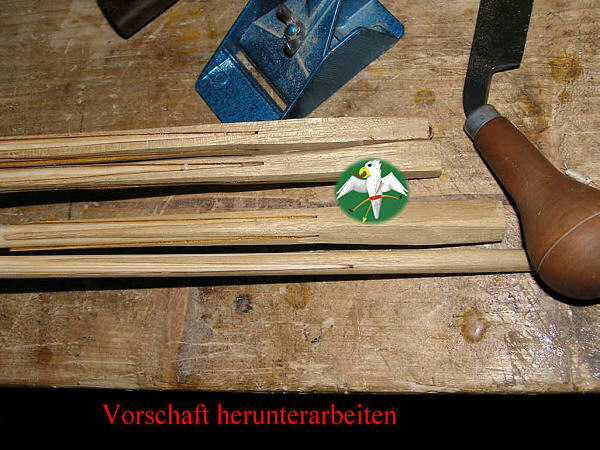
Work down the bulk of the foreshaft with drawknife or whatever you have at hand (rasp, knife etc.). |
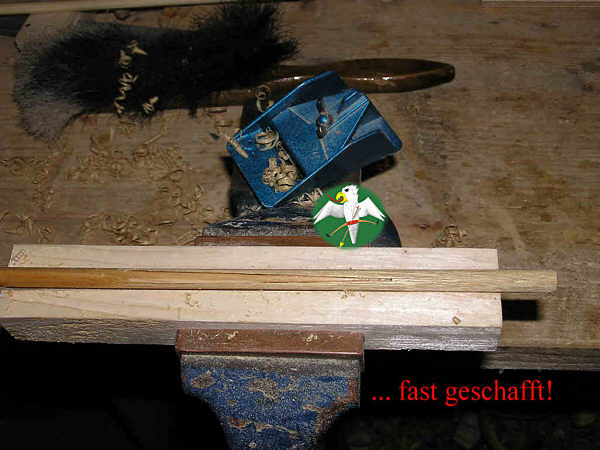
Final step is done with a small plane (works with razor blades) and a cabinet scraper. You can do this also with a knife, rasp, a belt sander or just garnet paper. I hold the shaft with one hand and turn it around as I plane all sides even. A block of wood with a groove along its lenght will help a great deal to secure the shaft ndash; as seen here. It's easy to make: place two flat pieces of wood together in a wise and drill a shaft sized hole down the connecting plane. Done! |
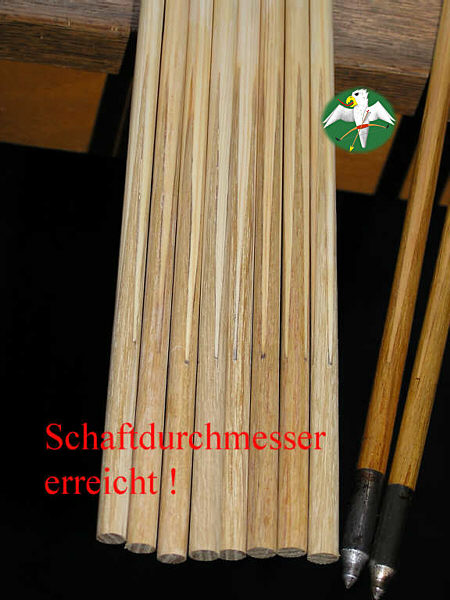
Sand the shaft to a smooth surface and to blend all together. Ready! The wood I used for footing here is Black Locust. |
|
The purpose of footing is mostly seen as making for a stronger arrow, less likely to break behind the point. Well, that's only half of the story, as I explained the other year somewhere on TradGang. The target archer of the 19th century, when archery was en vogue and became popular again after a long dormacy, prefered a footed arrow because of it's shooting characteristics. We are talking FOC now! As can be seen in books from Horace Ford (1880) or Longman & Walrond (1894) – they often used a "pile" or point which, at best, was a bullet jacket. Their weight was negliable. They badly needed the dense (= heavy) hardwood footing to add weight to the front end of their arrows. Added strength and the fancy look were only a welcomed bonus. And they certainly look good, right?! Enjoy! Falk |